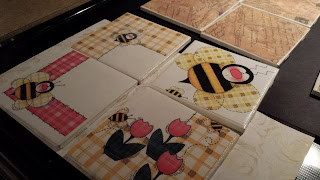
MOD PODGE COASTERS
These were so easy and quick, I could have made a ton more if I had bought more tiles from Lowes earlier in the weekend....But here is a quick tutorial:
SUPPLY LIST:
- Plain white tiles -I got mine at Lowes for .16 cents each!!
- Mod Podge
- Craft paper, scrapbook paper or any other types of paper
- Scissors or a small paper cutter
- foam craft brush
- Clear spray sealer
- Felt (for the backing)
- Hot Glue Gun
1. I have BOXES of scrap booking paper from when I was really into the scrapbooking craze a few years ago...I keep it around for random projects or for when my daughter wants to do paper and sticker crafts. I choose a few pages of really pretty paper I had, but never used. It was "too nice" for Victoria to color on and "too pretty" to use elsewhere. So I finally had an excuse to put them to use!
3. Cover your tile with a generous amount of Mod, and center your paper on it. I cut my squares just a little shy of the edges to let some of the white from the tile show, but do what makes you happy :-)
4. Put a coat of Mod over the paper once its on the tile and let dry, about 15-20 minutes. I did two coats of mod and then my clear spray sealant.
Below are some pictures of the 3 sets of 4 that I did last night:
5. When your Mod Podge is dry and your sealer dry, cut your felt to size and break out the glue gun. I have seen various ways of doing this, including "stuffing" a few cotton balls inside the felt to give it a little more stability. Its up to you.
6. If you plan on giving these as gifts, it looks really pretty wrapped in tissue paper and tied with an organza ribbon and a hand written tag. These can be made in 4,6, 8 or more groupings. I have seen some use napkins, wrapping paper, newspaper, book pages etc. so it really is up to you and your imagination!!
Random Photo: My kitty attacking my drawer of scrapbooking paper...He gets into EVERYTHING! He almost Mod Podged his paws...
HAVE FUN!!


No comments:
Post a Comment