Tuesday, August 23, 2016

Football cake pop Centerpieces


Football season is upon us! I can not WAIT!! (Go DUCKS, BTW!!)

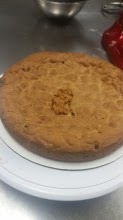
We had a client this week who wanted a cake and coordinating centerpieces football themed in FSU colors. We were trying to be cost effective and creative, but also wanted a great presentation. First, make your cake pops in the colors designs you'd like to have - Here is the link just in case to the Cake pop directions .


First, we had to find a base that would be heavy enough to hold down when people pulled out the cake pops. We found these tea lite candle holders at the dollar store, and we used them turned over, so when we hot glued the footballs down, there would be more surface to cling to it. They were a great weight and perfect for what we needed them for.


Next we found the squishy type footballs (also at the dollar store) because we were going to put the cake pops into the football. We had a hard time finding all the footballs at one store, so we ended up going to 5 different stores to get 8 footballs - Go figure. We hot glued the footballs to the candle bases and let set


While these were setting, I began to make some bows that were going in the front of the football. We used ribbon color to match the FSU school colors. We had some football cupcake picks that we used as the center of the bow, and added a really nice touch. 


For some reason, I didn't get a picture of the completed bow with the tails on it - Sorry! (But I am sure you guys can imagine it :-)


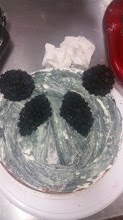
After all the cake pops were wrapped, we tied gold and black ribbon around each one to create some filler in the footballs.  We used a drill bit to make our holes in the football so that the cakepops wouldn't get damaged when we inserted them. Added the bow with the football on it, and they came out looking so great! Our client loved them! 


What do you guys think of these? Who are you rooting for this year? Anyone play fantasy football? I hope I can whoop my husbands butt this year!! 


Giant Panda Cookie Cake


Hi guys!

I wanted to share some new stuff with you all, and I know it has been FOREVER, but I am trying really hard to post some new content and some DIY stuff, cake stuff and cooking stuff. So bare with me if my posts are far and few between!

I wanted to share a quick tutorial on a Panda Cookie Cake that we just did for a client last weekend. It was really easy to do, so, here are the basics and step by step.


1. Make whatever cookie dough you want to use - In this case, the client wanted chocolate chip. I used a spring form pan (the kind you would use for a cheesecake) and sprayed with pan spray, and put my dough in.


2. I used some of my Italian Buttercream to smooth over the top to make my surface a little smoother, but if it cakes flat, all the better. I also carved out a half circle section where the Panda Ears are going to go. I used a cookie with a little frosting to set it.


3. I started with my black frosting using a star tip - you can use any size you wish, but for the panda I used a smaller tip for the black and a bigger one for the white. In my crumb coat, I drew slightly the outline where I wanted the eyes to sit and filled in with my black frosting. I also filled in the ears.


4. After the black, I started with the white and filled in everywhere else. I did two or three layers on the nose/snout to give a little more of a 3D look. I also did a row around the head slightly on the side to cover the edge of the cookie cake as well as the ears. 


5. Lastly, I added small whites of the eyes and small black for the nose. I added 2 chocolate sprinkles for the eye pupil's. I boxed it up and had it out the door.


Pretty cute, huh? I was very happy with how this turned out and the client was in love with it! What other animal faces would look good on a cookie? 


Buffalo Ranch Tuna Cups

 Buffalo Ranch Tuna Cups So, I am not a huge tuna eater. I'm more of a steak, chicken, and seafood chick (well, aside fr...