Hi guys!
I wanted to share some new stuff with you all, and I know it has been FOREVER, but I am trying really hard to post some new content and some DIY stuff, cake stuff and cooking stuff. So bare with me if my posts are far and few between!
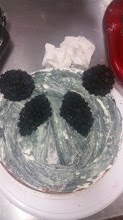
I wanted to share a quick tutorial on a Panda Cookie Cake that we just did for a client last weekend. It was really easy to do, so, here are the basics and step by step.
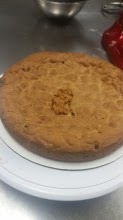
1. Make whatever cookie dough you want to use - In this case, the client wanted chocolate chip. I used a spring form pan (the kind you would use for a cheesecake) and sprayed with pan spray, and put my dough in.
2. I used some of my Italian Buttercream to smooth over the top to make my surface a little smoother, but if it cakes flat, all the better. I also carved out a half circle section where the Panda Ears are going to go. I used a cookie with a little frosting to set it.
3. I started with my black frosting using a star tip - you can use any size you wish, but for the panda I used a smaller tip for the black and a bigger one for the white. In my crumb coat, I drew slightly the outline where I wanted the eyes to sit and filled in with my black frosting. I also filled in the ears.
4. After the black, I started with the white and filled in everywhere else. I did two or three layers on the nose/snout to give a little more of a 3D look. I also did a row around the head slightly on the side to cover the edge of the cookie cake as well as the ears.
5. Lastly, I added small whites of the eyes and small black for the nose. I added 2 chocolate sprinkles for the eye pupil's. I boxed it up and had it out the door.
Pretty cute, huh? I was very happy with how this turned out and the client was in love with it! What other animal faces would look good on a cookie?


No comments:
Post a Comment