Wednesday, November 27, 2013

DIY Baby Diaper Changer - Baby Girl Owls


Here is another version of the baby diaper changer - I made an original one (see it here ).

This one was the finished product and was paired with the No Sew Tutu for girls and a few iron on onsies that I gifted together for a baby shower...

The tutorial is the same basic way - a rectangular cut out, with a slightly rounded top.


With this one, I stitched on the Velcro pieces, and added on a cool ribbon on the back to have a fun way to close up the pad.


This one is also reversible, with a pink nubby type fleece on one side and the cotton blend owl print on the other...


Doesn't it all look so pretty put together??


Monday, November 25, 2013

DIY Christmas Wreath - Part 2


I LOVE this wreath too!!! Part of my Saturday craft day was making some Christmas wreaths with my friend and Co-worker Lydia...This is hers, but you can see mine here).

This is the one she did, and I got her permission to post a quick tutorial and some pictures!

As you can see here, I did kind of miss a photo op - however, this is a regular foam wreath she picked up at Hobby Lobby (with a 40% off coupon too!) and some white snowflake wired ribbon. She hot glued a tack down starting on the back side and wrapped the ribbon wide around the wreath, using a tack of glue every so often to keep it from slipping.


Once the ribbon was wrapped, we made a quick bow, and hot glued that down, with the two tails glued separately in order to keep the bow straight. Also, a loop was hot glued to the back for the holder.


Then a few sprigs of greenery, bulbs and berries were placed in the center of the bow to create a full effect, and then added red and white glitter snowflakes to the top left and lower right side...


And here it is on her door!!! I really love the simplicity but awesome beauty of this!!! Plus the glitter is fabulous!!! :-)

Also, since I had a two pack of glitter deers, she used one in the center of hers for a fun element!! I just LOVE it!!


DIY - Christmas Wreath - Part 1


I love Christmas!!! And I love to make wreaths!!! I think I love this one even more than my Fall wreath!! (You can see this one here!)
 
And here is the link to the DIY wreath part 2.
 
Anywho, Here are some pictures and few tips!!
 
On this craft day, it was myself and a friend who got together to do some Christmas wreaths - I am doing two different posts/tutorials, as we both did something a little different :-)
 
We first dumped everything into the middle of the table!
 
 
I then scored and snapped off all the metal pieces of floral stems and stacked them up. most of my pieces came from the dollar store!!  I think about 10 bucks for all you see here!!


I hot glued and then wrapped my wire edge ribbon loosely around the wreath to give it some bulk and figured I would place my items around and between it...

 
I started adding in my pinecones, pieces of flora's and berries...

 
I picked up two of these glitter reindeers and I really thought it would be cool to have it as dangle effect in the middle of my wreath!


I managed to stick a glitter bow on the bottom and I think I had just enough glitter, gold and bling to bring the festivities to my door!!


Texas Toast French Toast Recipe - Don't knock it until you try it!


So, I get a LOT of mumbling and looks when I tell people about this dish - really, it is FANTASTIC and a great mix of sweet and savory! It's kind of the "chocolate covered bacon" mentality - it sounds weird, but I'm telling you, you HAVE TO TRY THIS!!


Ingredients: (this serves 2)

4 of sliced Garlic Butter Texas Toast
2 eggs
1.5 tsp cinnamon
1 tsp vanilla
2 tsp honey
2-4 tbls of whole milk/buttermilk
1/4 c. powdered sugar


To make:

In a bowl, wisk together eggs, milk, cinnamon, vanilla and honey until very well mixed.

One/two slices at a time, put the Texas Toast in the egg mixture and let sit to absorb for 1-3 minutes.

In a heated skillet, place 2 slices in the pan, flipping after 2-3 minutes on each side.

Place on plate, pour on some warm syrup and sift on the powdered sugar


Have you every tried this? Please share what you first thought of it, and what you think of it when you tried it!

DIY - Toddler dress to Big Girl Apron!


Ok, so I posted about a month back of a dress to apron tutorial, which was a lined dress, and was very pretty, but took some time (see this tutorial here. )

This one was a little easier, as this was for a waist apron, vs the around the neck full apron.


This originally started as a weird looking toddler dress and was, it looked like, a home economic or self made dress that was recycled to the thrift store. I picked it up for the wide ribbon at the waist, the bright colors and the mix of dots and stripes, as well as the "sparkle" bedazzle look that was embellished on the skirt.


This was really easy to take apart - seam ripped up each side and at the shoulders. I took of the ribbon which was stitched on after (so not apart of the seams originally) and set it aside. I cut the bodice of the dress JUST about the arm pits to make a straight edge at the top of the stripe.


I ironed out all the pieces, made a quick seam attaching the tie to the new "top" of the apron and then ran a quick running stitch to hold the crease in place and for decorative purposes. I also re-did the side hem and a decorative zig-zag stitch at the bottom.


This is going into the baking box for a 7 year old - I think this came out really well and for 2.50 and a DIY recycle/up cycle this is perfect!

What kind of thrift store clothing have you upcycled?


Friday, November 22, 2013

DIY - Project DIY Jewlery - M&J Trimming


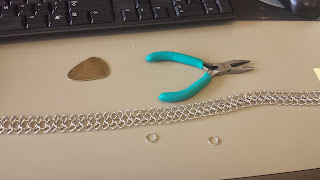
A friend of mine who works in the office with me, runs her own blog about her subscription boxes, makeup boxes, free products she gets to try and lot of reviews!!  She brought this DIY jewelry Box in today By Project DIY (Click here to see their page!) and the one she got today for me to try out and review was the Joan Of Arc collection.

You can check out Christy's blog here at  www.mysbaddiction.com to see her contests, freebies, review and many subscription boxes!


Anyway, This is a jewelry box that she had me try and I was excited to pull everything out. This box came with the tools (pliers and cutters) but I do not think these actual box comes with these.

There were two projects to do: A chainmail necklace and a cuff bracelet. I just did the necklace today.

I think that it was a good estimate of time that they gave (25 minutes) and I took this time and a little longer. This is because the necklace was broken in the middle and it took forever to get the links lined up the right way to put back together. That took about 10-15 minutes.


The directions were very easy to follow, and in color - the only drawback was that you had to go online to get the directions - this is probably to draw traffic to the site, but it would be a pain in the butt for a young adult or older person to go online etc. It would be nice to have the print outs in the box.


I loved that this was a mixed metal collection and that really, everything was included! I like that the instructions were clear, but that you didn't have to ONLY do what they wanted - you can get really creative with it.


I really liked the small embellishments that were included, and was happy with the glue that was provided too! Seems like it would mean not having to go looking through craft boxes for craft glue or having to stop to go to the store. This was very convenient and very smart!!

 
The detail in the beads and chainmail were very beautiful - I love the possibilities it can have, and the chainmail makes it very easy to add any of your own elements that you have on hand...I think I will be wearing this with my New Years Eve Outfit !


Overall, this is a fun kit and I would use this kind of kit again and probably use it as a gift to my little sister, who LOVEs doing fun stuff with jewelry.


What are some of your FAVORITE jewelry trends right now?


Tuesday, November 19, 2013

DIY - (baby) girl NO SEW Tutu!


So, I call this post a "Baby" girl tutu tutorial, but really, this can be made for big girls too!! I especially love that this is a no sew (I wish I knew how to do this a few years ago!) and will take just an hour to make. This is also a good project for older kids to do if you want to keep their hands busy!


For this one, I made it for a new born (yet to arrive!) and I got 4 yards of white and 4 yards of pink - looking back, I probably could have done just 2 yards of each and still had left over.

Granted, this depends on how POUFY you want your tutu to be :-) The 8 yards total I had made 2 tutu's and had some left over!!


First, I laid out my folded Tulle and stacked the white on the pink. I cut down the length (at the fold) so that I now had 4 pieces of 4 yards.


Once that was done, I folded the tulle in half (so I had 2 yards) and cut along the short side (so I now had 8 layers - follow so far?)

Then I folded all those layers in half, lengthwise, to make cutting my strips easier - I cut my strips about two inches wide.


Once all the cutting was done, you should end up with a big pile of strips that are about 2 inches wide, and about 12 -15 inches long.

**If you want to do this an easier way, get the spools of tulle and just make 12-15 inch cuts! **


Next, get your length of elastic (not shown) and measure it to the size you want it to be- remember to take into account any stretch you need/want.

Sew the ends closed using a sewing machine and go over it a few times :-)

**I used a wide ribbon on my 2nd one I made, and I sort of wrapped it around the elastic, like a casing. You  can do this or not, but if you use a ribbon, it comes out a little more tidy and with more flair...** (sorry there are no pictures :-(  )


Now here comes the part which might sound confusing: Make a loop so the tails are even. Wrapping it around the elastic, put the tails through the loop and gently pull down, so that the tulle is not attached to the elastic.


Do this all the way around, in whatever pattern you want - I did mine alternating pink and white, but you can do all one color, multi color etc. Personal preference :-)
 
 
Here is the finished tutu!! Look out for the DIY baby shower gift it will go with!!


I think I am going to make a tutu for Tori for Christmas, as well as some other girls that I have to find Christmas Gifts for - and don't lie!! You know you totally want one!!!


Monday, November 18, 2013

DIY Christmas Ornaments - Cupcakes - Take 3!


Okay, Okay. So maybe I obsess just a little??

I mean, perfection takes time!

And I think I found it this go round!!

(In case you wanna start with Part 1, click here  and to see Part 2, click here.)


Picture above has what I used, but a quick run down:
 
  • Glass bulbs
  • cupcake liners
  • white acrylic paint
  • REAL sprinkles! (Whoo hoo!)
  • and some Christmas trim things that look like cherries
  • Paint brush


Same as the last one, I dabbed on some white paint and when it was about 30% dry, I put on those sprinkles!!
 
 
Once the paint was 100% dry, I hot glued the "cherry" on and it looked PERFECT!! Hot glued the liner on the bottom and they were done!! LOVE THEM!! 


 I mean really, who doesn't like cupcakes that don't make you gain weight!?


Buffalo Ranch Tuna Cups

 Buffalo Ranch Tuna Cups So, I am not a huge tuna eater. I'm more of a steak, chicken, and seafood chick (well, aside fr...